Blog Layout

Concrete Maintenance Checklist for Commercial Properties
November 18, 2024

Concrete is a popular choice for commercial properties due to its durability, strength, and low maintenance requirements. However, even the most resilient concrete surfaces require regular upkeep to maintain their appearance and structural integrity. Whether you own an office building, retail space, or industrial facility in London, Ontario, having a concrete maintenance plan in place is crucial to prolonging the life of your property’s concrete features.


In this guide, we'll walk you through a comprehensive concrete maintenance checklist to keep your commercial property in top shape year-round.


Why Concrete Maintenance Matters

Before diving into the checklist, let's discuss why concrete maintenance is essential for commercial properties:

  • Enhanced Durability: Regular maintenance prevents small issues from becoming major problems, ensuring the longevity of your concrete surfaces.
  • Safety: Cracks, spalling, or uneven surfaces can create trip hazards. Regular inspections help you address these safety concerns.
  • Aesthetic Appeal: Well-maintained concrete enhances the curb appeal of your property, making it more attractive to tenants, customers, and visitors.
  • Cost Savings: Proactive maintenance is more cost-effective than major repairs or complete replacements, saving you money in the long run.


The Ultimate Concrete Maintenance Checklist

Follow this checklist to ensure your commercial concrete surfaces are well-maintained and ready to withstand the elements in London, Ontario.


1. Regular Inspections

  • Frequency: At least twice a year (spring and fall) and after severe weather events.
  • What to Look For:
  1. Cracks, chips, or spalling
  2. Stains or discoloration
  3. Uneven surfaces or sunken areas
  4. Exposed rebar or other signs of structural damage


Regular inspections help you catch issues early before they worsen and become costly to repair.


2. Cleaning Concrete Surfaces

  • Frequency: Every 3-6 months, depending on foot and vehicle traffic.
  • Recommended Method:
  1. Use a pressure washer to remove dirt, debris, and stains.
  2. For oil or grease stains, apply a commercial concrete cleaner.
  3. Avoid harsh chemicals that can degrade the concrete surface over time.


Regular cleaning not only keeps your concrete looking fresh but also prevents the buildup of substances that can cause damage.


3. Sealant Application

  • Frequency: Every 2-3 years, or as needed based on wear.
  • Benefits:
  1. Protects against water penetration, freeze-thaw cycles, and chemical spills.
  2. Enhances the appearance by giving concrete a clean, polished look.


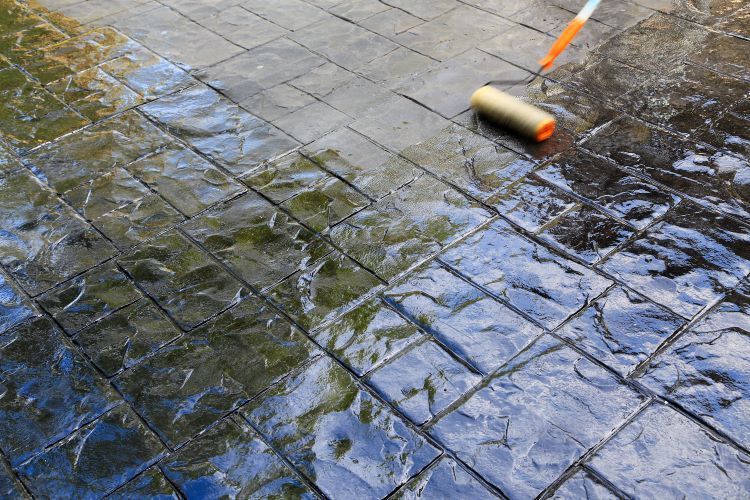
Applying a high-quality concrete sealer is crucial, especially in areas like London, Ontario, where freeze-thaw cycles can cause concrete to crack and deteriorate.


4. Repairing Cracks and Joints

  • Frequency: As soon as cracks are detected.
  • What to Do:
  1. Small cracks can be filled with a concrete crack filler.
  2. Larger cracks or damaged joints may require professional repair.
  3. Ensure expansion joints are free of debris and are functioning correctly to accommodate concrete movement.


Prompt crack repair prevents moisture from seeping into the concrete, which can lead to more severe damage over time.


5. Resurfacing Worn-Out Areas

  • Frequency: Every 5-10 years, or when surfaces show significant wear.
  • Process:
  1. Concrete resurfacing involves applying a new layer of concrete or overlay to refresh the appearance and improve durability.
  2. Ideal for restoring the look of parking lots, walkways, or heavily trafficked areas.


Resurfacing is a cost-effective alternative to full replacement and can extend the life of your concrete surfaces.


6. Addressing Drainage Issues

  • Frequency: Annually, or after significant changes in weather patterns.
  • What to Check:
  1. Ensure water is draining away from concrete surfaces.
  2. Look for pooling water or areas with poor drainage.
  3. Clean out drains, gutters, and catch basins regularly to prevent water damage.


Proper drainage is crucial to preventing water damage that can erode concrete surfaces and weaken their structural integrity.


7. Winterization Tips

  • Frequency: Every fall, before the first freeze.
  • Best Practices:
  1. Remove snow and ice promptly to prevent damage from freeze-thaw cycles.
  2. Use non-corrosive de-icers, such as calcium magnesium acetate, instead of rock salt, which can damage concrete.
  3. Consider applying a protective winter sealant to shield concrete from harsh winter conditions.


Winter weather in London, Ontario, can be tough on concrete. Proper winterization helps protect your surfaces from cracking and spalling due to freezing temperatures.


8. Addressing Stains and Discoloration

  • Frequency: As needed, based on the appearance of stains.
  • What to Do:
  1. Use a commercial concrete cleaner for stubborn stains.
  2. For organic stains, like leaves or algae, use a mix of water and mild detergent.
  3. Apply a stain-resistant sealer to prevent future staining.


Maintaining the aesthetic appeal of your commercial property is key to making a good impression on clients and visitors.


9. Professional Maintenance Services

  • Frequency: Annually, or as needed based on the condition of your concrete.
  • Why Hire Professionals?:
  1. Professional concrete contractors can provide deep cleaning, crack repair, and sealing services that go beyond standard DIY maintenance.
  2. They have the expertise and equipment to assess and repair concrete damage effectively.


Partnering with a professional concrete maintenance company ensures that your commercial property receives the best care, preserving its value for years to come.


Conclusion

Concrete is a durable and versatile material, but like any other part of your commercial property, it requires regular maintenance to stay in top condition. By following this concrete maintenance checklist, you can extend the lifespan of your concrete surfaces, enhance their appearance, and protect your investment.


At Concrete Contractors London, we specialize in concrete maintenance, repair, and restoration services for commercial properties in London, Ontario. Whether you need crack repairs, resurfacing, or sealing, our team has the expertise to keep your concrete in excellent condition. Contact us today for a consultation and let us help you protect your property with professional concrete maintenance solutions.
December 2, 2024
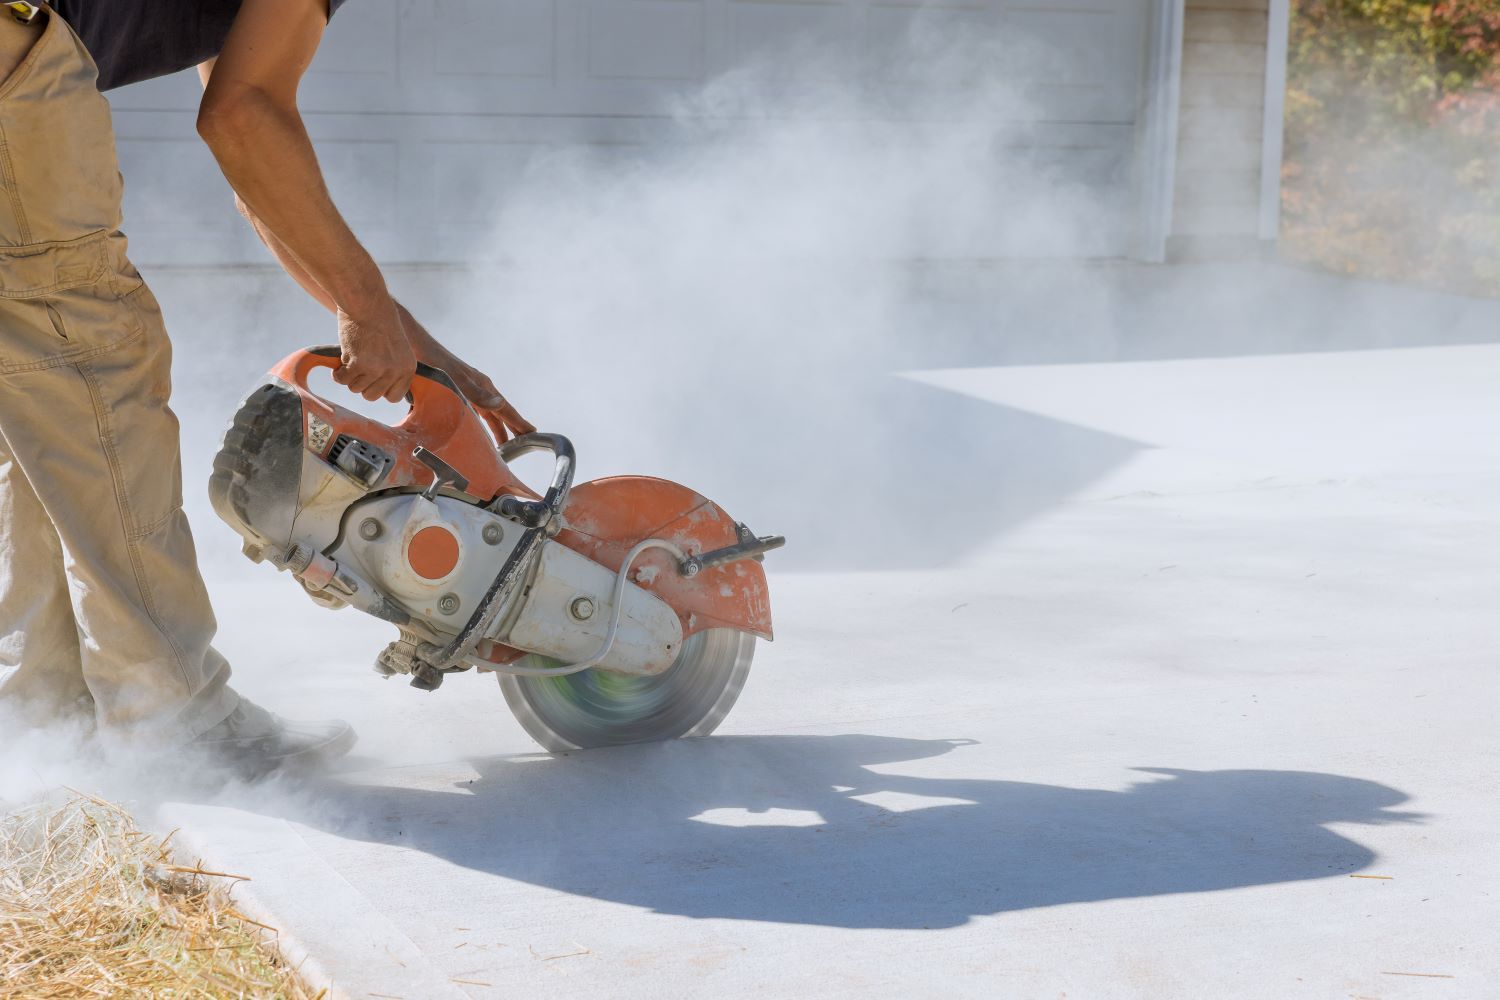
Concrete demolition is often perceived as a noisy, dusty, and time-consuming process. However, advancements in tools and techniques have streamlined the process, making it more efficient and precise. One such technique is concrete cutting , which has revolutionized how contractors handle old concrete removal. For homeowners and businesses in London, Ontario, concrete cutting is the go-to method for faster, cleaner, and more effective demolition. What Is Concrete Cutting? Concrete cutting is a controlled process of removing sections of concrete using specialized tools such as saws equipped with diamond blades. Unlike traditional demolition methods, which rely on brute force, cutting offers precision and minimizes damage to surrounding areas. Why Choose Concrete Cutting for Demolition? Concrete cutting offers numerous advantages over traditional methods like jackhammering. 1. Precision and Control Cutting allows contractors to remove specific sections of concrete without impacting nearby structures or utilities. This is especially important for projects involving structural integrity, like sidewalks, driveways, or walls. 2. Speed and Efficiency By targeting only the necessary areas, concrete cutting speeds up the demolition process. Instead of spending hours or days chipping away at concrete, sections can be removed in a fraction of the time. 3. Reduced Noise and Dust Traditional demolition methods are notorious for excessive noise and dust. Cutting significantly reduces both, creating a cleaner and less disruptive environment—ideal for residential areas in London. 4. Versatility Concrete cutting works on various surfaces, including slabs, walls, and curbs, making it suitable for diverse projects like driveway removal, basement renovations, or structural repairs. How Cutting Speeds Up Concrete Removal 1. Segmenting Large Slabs Cutting breaks down large slabs into manageable pieces, simplifying the removal process. Contractors can cut the concrete into grids or specific shapes for easy transport and disposal. 2. Access to Hard-to-Reach Areas For tight spaces or areas with limited accessibility, concrete cutting tools like wire saws and wall saws allow for precision demolition without the need for heavy machinery. 3. Avoiding Damage to Surrounding Structures Cutting ensures that only the targeted section is removed, preventing damage to adjacent materials or foundations. This is particularly useful for projects like driveway extensions or repairing damaged patios. Applications of Concrete Cutting in Demolition Concrete cutting is versatile and can be used in various demolition scenarios: Driveway Removal : Replace old, cracked driveways quickly and efficiently. Sidewalk Repairs : Remove damaged sections of sidewalks without disturbing the surrounding areas. Wall Modifications : Create openings for doors, windows, or other structural changes. Floor Removal : Take out basement floors or garage slabs for renovations or repairs. Steps in the Concrete Cutting Process Assessment : Determine the scope of the project, including the area to be removed and surrounding structures. Preparation : Mark the cutting lines and ensure the site is clear of debris and obstructions. Cutting : Use the appropriate saw (slab, wall, or wire) to cut the concrete precisely. Removal : Break down the cut sections into manageable pieces and remove them safely. Cleanup : Minimize dust and debris to leave the site clean and ready for the next phase of the project. Why Choose Concrete Contractors London? At Concrete Contractors London, we specialize in professional concrete cutting and demolition services. Our experienced team uses state-of-the-art tools and techniques to ensure your project is completed efficiently and with minimal disruption. Whether you're removing a damaged driveway or preparing for a renovation, we deliver results tailored to your needs. Conclusion Concrete cutting is a game-changer for demolition projects. Its precision, efficiency, and reduced environmental impact make it an ideal choice for removing old concrete in London, Ontario. If you’re planning a demolition project, trust Concrete Contractors London to handle the job with expertise and care. Contact us today for a consultation!
November 24, 2024
When it comes to installing a new driveway or replacing an old one, homeowners in London, Ontario, often face a crucial decision: concrete or asphalt? Both materials have their advantages and disadvantages, depending on factors like climate, budget, and aesthetic preferences. This guide compares concrete and asphalt driveways to help you make an informed choice for your property. Concrete Driveways Pros: Durability Concrete driveways are known for their long lifespan, often lasting 30 years or more with proper maintenance. This makes them a solid investment for homeowners looking for a durable and low-maintenance solution. Low Maintenance Concrete requires minimal upkeep. Occasional sealing and cleaning can keep it looking fresh and functional for years. Versatile Aesthetics With the option to stain, stamp, or texture the surface, concrete driveways offer a wide range of customization. You can achieve various colors and patterns to complement your home’s design. Eco-Friendly Concrete is made from abundant natural materials, and its lighter color reflects sunlight, reducing the heat island effect around your home. Cons: Higher Upfront Cost The initial cost of a concrete driveway is higher than asphalt. However, this can be offset by its longevity and lower maintenance expenses over time. Longer Installation Time Concrete requires more time to cure before it can be used, which may delay your project completion compared to asphalt. Susceptibility to Cracking While durable, concrete can crack due to freeze-thaw cycles in colder climates like London. Regular sealing can help minimize this issue. Asphalt Driveways Pros: Lower Initial Cost Asphalt driveways are generally more affordable to install, making them a popular choice for budget-conscious homeowners. Quick Installation Asphalt is ready to use much sooner than concrete, typically within a day or two of installation. Weather Resilience The dark color of asphalt absorbs heat, helping snow and ice melt faster during Ontario’s cold winters. Flexibility Asphalt is less prone to cracking than concrete, thanks to its flexibility, which allows it to adapt to slight shifts in the ground. Cons: Shorter Lifespan Asphalt driveways usually last 15 to 20 years, about half the lifespan of concrete. Higher Maintenance To maintain its appearance and durability, asphalt needs regular sealing, typically every 3–5 years. Limited Aesthetic Options Asphalt is primarily available in black and lacks the customization potential of concrete. Environmental Impact Asphalt is derived from petroleum, which has a higher environmental footprint compared to concrete. Key Considerations for Homeowners in London, Ontario When choosing between concrete and asphalt, consider the following factors: Climate: Concrete may require more attention in freeze-thaw conditions, while asphalt may need more frequent sealing in high-traffic areas. Budget: Asphalt is cost-effective upfront, but concrete offers long-term savings. Aesthetic Appeal: If customization is important, concrete provides more options to enhance curb appeal. Maintenance: Decide how much time and effort you’re willing to invest in upkeep. Conclusion Concrete and asphalt driveways each have unique benefits and drawbacks. Concrete stands out for its durability and design versatility, while asphalt is more budget-friendly and better suited for quick installations. At Concrete Contractors London , we specialize in creating high-quality concrete driveways tailored to your needs. Whether you're drawn to the longevity of concrete or want to explore its decorative possibilities, our team is here to guide you every step of the way. Contact us today for a free consultation and start transforming your driveway into a durable, beautiful feature for your home!
November 11, 2024
Concrete sealing is a crucial step in preserving the durability, appearance, and lifespan of your concrete surfaces. Over time, however, old sealers can become worn out, discolored, or damaged, reducing their protective effectiveness. Before applying a new layer of sealer, it’s essential to remove the old one properly to ensure a smooth, long-lasting finish. At Concrete Contractors London , we specialize in concrete maintenance and sealing for homeowners and businesses in London, Ontario. In this guide, we'll walk you through the process of removing old sealer from your concrete surfaces before reapplying a fresh coat. Why Remove Old Concrete Sealer? Before reapplying a new sealer, it's important to remove the old one for several reasons: Improved Adhesion : New sealer adheres better to a clean surface, preventing peeling or flaking. Enhanced Appearance : Removing old, discolored sealer restores the concrete's natural look, providing a fresh canvas for the new sealer. Better Protection : Properly removing the old layer ensures that the new sealer can fully penetrate and protect the concrete, improving its resistance to water, stains, and wear. Step-by-Step Guide to Removing Old Concrete Sealer Removing old concrete sealer can be done using one of three methods: chemical strippers, power washing, or mechanical grinding. The method you choose will depend on the type of sealer, its age, and the condition of your concrete. 1. Assess the Type of Sealer Used Before you start, determine the type of sealer currently on your concrete. Most sealers fall into two categories: Solvent-based sealers : Typically have a glossy finish and require chemical strippers for removal. Water-based sealers : Often have a matte finish and may be easier to remove with power washing or scrubbing. If you're unsure about the type of sealer, test a small, inconspicuous area with a chemical stripper to see how it reacts. 2. Gather the Necessary Supplies To remove old concrete sealer, you’ll need: Chemical concrete sealer stripper (for solvent-based sealers) Pressure washer (for water-based sealers) Protective gear (gloves, safety goggles, mask) Scrub brushes or a floor scrubber Plastic scraper or putty knife Bucket and water Shop vacuum or broom Concrete cleaner (optional) 3. Prepare the Area Before starting the removal process, ensure the area is well-ventilated if working indoors. Protect surrounding plants, furniture, and other surfaces from chemical strippers or debris. Clear the area : Remove any furniture, décor, or obstacles from the concrete surface. Sweep the surface : Use a broom or shop vacuum to clear away dirt, debris, and loose particles. 4. Apply a Chemical Stripper (for Solvent-Based Sealers) If you're dealing with a solvent-based sealer, a chemical stripper is your best option for effective removal. Choose the right stripper : Look for a commercial-grade, eco-friendly concrete sealer stripper. Apply the stripper : Pour or brush the chemical stripper evenly over the concrete surface. Follow the manufacturer's instructions regarding application thickness and wait time. Let it sit : Allow the stripper to sit on the surface for the recommended amount of time (usually 15-30 minutes). This will soften the old sealer, making it easier to remove. Scrape off the old sealer : Use a plastic scraper or putty knife to lift the softened sealer off the concrete. For large areas, a floor scrubber with abrasive pads can speed up the process. Rinse thoroughly : Once all the sealer is removed, rinse the surface with water and a scrub brush. Use a pressure washer for deep cleaning. 5. Power Washing (for Water-Based Sealers) For water-based sealers, power washing can be an effective and eco-friendly removal method. Set up the pressure washer : Use a pressure washer with a PSI of 3,000 or higher. Attach a 25-degree nozzle for the best results. Wash the concrete : Hold the wand at a 45-degree angle and spray the concrete in overlapping passes. Focus on stubborn areas that may need extra attention. Let it dry : Allow the concrete to dry completely before reapplying the new sealer. 6. Mechanical Grinding (for Tough, Stubborn Sealers) If chemical strippers and power washing don’t fully remove the old sealer, mechanical grinding may be necessary. Use a concrete grinder : A floor grinder with diamond-tipped blades can remove tough sealers and smooth the surface. Grind in passes : Move the grinder in even, overlapping passes to avoid gouging the concrete. Clean up the dust : After grinding, vacuum or sweep up the concrete dust thoroughly. 7. Clean and Prepare the Surface for Resealing After removing the old sealer, it’s crucial to prepare the concrete for the new application: Wash the concrete : Use a concrete cleaner or mild detergent to remove any remaining residue. Neutralize the surface : If you used a chemical stripper, neutralize the surface with a mixture of water and baking soda to prevent any reaction with the new sealer. Allow to dry : Let the concrete dry for at least 24-48 hours, depending on weather conditions, before applying a new sealer. 8. Apply the New Concrete Sealer Now that your concrete is clean and free of the old sealer, it's time to apply a fresh coat. Choose the right sealer : Select a sealer that matches your needs, whether it’s for outdoor patios, driveways, or basement floors. Popular options include acrylic sealers, epoxy coatings, and penetrating sealers. Apply evenly : Use a roller or sprayer to apply the new sealer in thin, even layers. For best results, follow the manufacturer’s instructions on drying times and reapplication. Cure and protect : Allow the sealer to cure for the recommended period before using the surface. Final Thoughts Removing old sealer from concrete surfaces is an essential step for achieving a smooth, professional finish when resealing. Whether you're tackling a patio, driveway, or basement floor, following these steps will help ensure that your new sealer adheres properly and provides long-lasting protection. At Concrete Contractors London , we’re here to help you with all your concrete maintenance and sealing needs in London, Ontario. Contact us today to schedule a consultation and let our experts restore the beauty and durability of your concrete surfaces!
November 4, 2024
Winter in Ontario can be tough on concrete surfaces. Freezing temperatures, snow, ice, and de-icing chemicals all take a toll, leading to cracks, erosion, and other damage if not properly addressed. Proper preparation can make all the difference in extending the life and durability of your concrete, whether it’s a driveway , patio , sidewalk , or foundation . At Concrete Contractors London, we’ve put together a guide to help you protect your concrete and get it winter-ready. 1. Inspect for Existing Damage Before the first frost, thoroughly inspect your concrete surfaces for cracks, chips, or any signs of wear. Small cracks may seem harmless, but they can worsen when water seeps in and freezes, expanding and further damaging the concrete. Addressing even minor issues now can save you from costly repairs later.  Repair Suggestions: For minor cracks, apply a concrete crack filler or patching compound. For larger cracks or chips, consider professional repair to ensure a lasting fix. Concrete Contractors London offers repair services tailored to prevent winter damage. 2. Clean the Surface Cleaning your concrete surfaces removes debris, salt, oil, and stains that may have built up during the warmer months. Debris can prevent effective sealing, and any acidic or chemical residues left on the surface can contribute to erosion. Use a pressure washer or a strong broom to remove dirt, leaves, and other materials. Pro Tip: Avoid using harsh chemicals, as these can damage the concrete. For best results, use a concrete-friendly detergent or cleaner designed for exterior surfaces. 3. Seal the Concrete Applying a high-quality sealer is one of the most effective ways to protect your concrete. Sealing creates a barrier that helps repel water, reducing the risk of cracking from freeze-thaw cycles. The right sealer can also provide protection against road salts and chemicals commonly used for de-icing. Types of Sealers: Acrylic Sealers: These provide a thin protective layer and are an economical option, though they may need to be reapplied each year. Penetrating Sealers: These absorb into the concrete, offering longer-lasting protection from water and salt. They are particularly recommended for driveways and high-traffic areas. Application Tips: Wait for a dry, sunny day to apply the sealer so it can cure properly. Follow manufacturer instructions for the best results, as some sealers require multiple coats or curing time. 4. Ensure Proper Drainage Pooling water can accelerate damage to your concrete surfaces, especially in winter when water freezes and expands. Check that your property has proper drainage away from concrete areas. Make sure downspouts direct water away from your driveway, patio, or walkways to minimize standing water that could lead to cracks. Drainage Solutions: Install drainage channels or add a slight slope to guide water away from your concrete. Clear leaves, dirt, and other debris from nearby drains and gutters to prevent water backup. 5. Avoid Using Harsh De-Icing Chemicals While it can be tempting to use de-icing chemicals during heavy snow, many of these products contain salt compounds that can damage concrete over time. These chemicals seep into the pores of the concrete, causing erosion and weakening the structure, especially as they freeze and thaw repeatedly. Safer Alternatives: Opt for sand or cat litter, which provides traction without harming the concrete. If you must use de-icers, look for products labeled “safe for concrete” or those based on calcium magnesium acetate, which are less damaging than traditional salts. 6. Consider Applying a Snow-Melt System For homeowners looking to keep concrete surfaces clear without the use of harsh chemicals, a radiant snow-melt system can be a worthwhile investment. These systems are installed beneath concrete surfaces and use heat to melt snow and ice automatically, reducing the need for shoveling or de-icers. Benefits: Increased safety on slippery surfaces. Long-term reduction in potential damage from de-icing products. 7. Be Mindful of Heavy Equipment and Shoveling Avoid using metal shovels on concrete, as they can scratch or chip the surface. Likewise, using snow plows or heavy machinery on concrete surfaces can cause surface damage, especially if the edges or corners of the concrete are impacted. Best Practices: Use plastic or rubber-edged shovels for gentle clearing. Avoid scraping the shovel hard against the concrete, as this can create sm all chips that may worsen over time. 8. Schedule Professional Maintenance if Needed If you’re uncertain about the condition of your concrete or if it requires more than basic upkeep, consider scheduling a professional inspection. At Concrete Contractors London, we can assess the health of your concrete and provide tailored winter preparation tips. Professional sealing, crack repair, and even resurfacing can be crucial steps in extending your concrete’s lifespan. Benefits of Winter Preparation for Concrete Surfaces Investing in these preparation steps is well worth the effort. Here are just a few benefits: Prolonged Lifespan: Well-maintained concrete can last for decades, and winter prep ensures it stands the test of time. Reduced Repair Costs: Preventing damage before it starts can save you money on major repairs or replacements. Increased Safety: Proper drainage, traction, and smooth surfaces reduce slip and fall hazards during icy weather. Get Your Concrete Winter-Ready with Concrete Contractors London Winter is a tough season for concrete, but with the right preparation, you can keep your surfaces looking great and functioning well year after year. At Concrete Contractors London , we provide professional repair, sealing, and maintenance services to help you safeguard your concrete against winter weather. Contact us today to schedule an inspection or learn more about how we can assist in preparing your concrete surfaces for the cold months ahead.
October 28, 2024
Concrete retaining walls are not only functional but also an aesthetically pleasing addition to outdoor spaces. Built to hold back soil, prevent erosion, and create defined outdoor areas, these walls must be durable and long-lasting to provide the desired stability. If you’re considering a concrete retaining wall, it’s natural to wonder how long it will last and what factors influence its longevity. Here’s an in-depth look at the lifespan of concrete retaining walls and what you can do to extend it.  The Expected Lifespan of Concrete Retaining Walls When well-constructed and maintained, concrete retaining walls can last anywhere from 50 to 100 years or even longer. This impressive lifespan is due to the inherent durability of concrete as a building material. Compared to other materials like wood or stone, concrete is especially resistant to weather and erosion, making it ideal for structures that need to stand the test of time. Key Factors That Affect the Longevity of Concrete Retaining Walls While concrete is a robust material, the longevity of a retaining wall depends on several factors: 1. Quality of Materials The quality of concrete, reinforcing materials, and other elements used in the wall’s construction will significantly impact its durability. High-quality concrete mixtures that incorporate proper ratios of cement, sand, and aggregates are essential. Additionally, reinforcing steel bars (rebar) provide extra stability to the structure, preventing cracking and bowing over time. 2. Proper Installation One of the most crucial factors for a long-lasting retaining wall is professional installation. Hiring experienced contractors who understand the specifics of structural support, soil characteristics, and drainage will ensure that the wall is constructed correctly from the start. A wall that is poorly installed may face issues such as soil movement, cracks, and instability in a short period. 3. Drainage System Adequate drainage behind a retaining wall is essential to relieve pressure on the structure. Without proper drainage, water can accumulate behind the wall, causing increased hydrostatic pressure. Over time, this can lead to cracking, bulging, or even collapse. Including weep holes or installing drainage pipes can help to channel water away from the wall, greatly improving its longevity. 4. Soil Conditions The type of soil around the retaining wall can also affect its lifespan. Clay soils, for example, retain water and expand, which puts additional pressure on the wall, while sandy soils drain more efficiently and don’t place as much strain on the wall’s structure. Proper assessment of the soil type will help contractors decide on the best foundation and support design for the wall. 5. Climate and Weather Exposure In regions with extreme weather, such as freeze-thaw cycles, retaining walls are more vulnerable to cracking and erosion. Freezing and thawing cause the water in the soil to expand and contract, putting pressure on the wall. Concrete is resistant to this process, but prolonged exposure without protection can impact even the toughest structures. Tips for Extending the Life of Your Concrete Retaining Wall While concrete retaining walls have a naturally long lifespan, there are a few additional steps that homeowners and businesses can take to ensure they last even longer. 1. Regular Inspections Regular inspections can help identify early signs of damage, such as small cracks or areas of erosion. Addressing these issues early on can prevent larger problems from developing, preserving the wall’s structural integrity over time. Consider annual inspections to catch any problems before they become costly repairs. 2. Sealant Application Applying a quality concrete sealant to the surface of the wall can provide an added layer of protection against moisture infiltration and weathering. Sealants are especially beneficial for walls exposed to high levels of moisture or in areas where freezing and thawing cycles are common. Sealants should be reapplied every few years for optimal protection. 3. Maintain Proper Drainage Check for any signs of water buildup or improper drainage around the retaining wall, particularly after heavy rain or snowmelt. Ensuring that weep holes are clear and drainage pipes are functioning will prevent hydrostatic pressure from compromising the wall. 4. Address Soil Erosion If you notice soil eroding near the wall’s base, it’s important to address this quickly. Erosion can destabilize the foundation, leading to tilting or cracking. You can reduce soil erosion by landscaping with plants that have deep root systems, installing mulch, or using landscaping fabric to stabilize the soil around the wall. 5. Professional Repairs If cracks or other signs of wear develop over time, it’s best to call in professionals for repairs. Attempting DIY fixes can sometimes worsen the problem, especially if it involves structural aspects of the wall. A skilled contractor can assess and repair any issues to restore the wall’s durability. Advantages of Concrete Retaining Walls for Long-Term Value Concrete retaining walls are highly durable, and their longevity provides excellent value for investment. Their strength and resilience mean they require fewer repairs and replacements over time, making them a cost-effective choice for both residential and commercial properties. In addition to durability, concrete retaining walls are versatile and can be customized to match your landscape design. They can be formed into a variety of shapes and textures, making them adaptable to different styles, from modern and sleek to natural and rustic. Why Choose Concrete Contractors London for Your Retaining Wall Project? When it comes to retaining walls, choosing a contractor with experience and expertise is key. Concrete Contractors London specializes in designing and building high-quality concrete retaining walls that are tailored to withstand the unique conditions in London, Ontario. With a focus on using top-grade materials and adhering to industry best practices, we ensure that your retaining wall is built to last. Our team can assess your site, recommend the best design, and install the wall with precision to ensure maximum durability. From drainage solutions to maintenance advice, we’re here to make sure your investment stands the test of time. Final Thoughts A concrete retaining wall is an investment that, when well-constructed and maintained, can last for many decades. Factors like material quality, proper installation, and drainage all play crucial roles in maximizing its lifespan. With regular maintenance and occasional professional inspections, your retaining wall will remain a stable and attractive feature of your property for generations. For those in London, Ontario, Concrete Contractors London is ready to help you design, install, and maintain a retaining wall that’s built for the long haul. Contact us today to learn more about our services and to get started on your project.
October 21, 2024
When it comes to industrial spaces, the flooring plays a critical role in ensuring safety, durability, and long-term functionality. Whether it's a warehouse, manufacturing plant, or commercial facility, the right flooring can significantly impact productivity and maintenance costs. Concrete, one of the most durable and versatile materials available, is often the top choice for industrial flooring solutions. At Concrete Contractors London , we specialize in delivering high-quality concrete solutions that meet the rigorous demands of industrial environments. In this article, we’ll explore the many benefits of using concrete for industrial flooring, and why it’s the ideal choice for businesses in London, Ontario. 1. Unmatched Durability Industrial environments experience heavy foot traffic, forklift use, and the movement of large machinery. This can take a toll on many flooring materials, but concrete offers exceptional durability that can withstand daily wear and tear without showing signs of damage. High Strength: Concrete is known for its ability to handle heavy loads, making it perfect for spaces that need to accommodate machinery, vehicles, or storage racks. Long-Lasting: With proper installation and maintenance, concrete floors can last for decades without needing to be replaced, reducing long-term costs. 2. Low Maintenance One of the most attractive benefits of concrete is its low maintenance requirements. Unlike other flooring options that may need frequent repairs, polishing, or replacement, concrete requires minimal upkeep. Easy Cleaning: Concrete floors are resistant to spills, stains, and dust, which makes them easy to clean with just a sweep and mop. This is especially beneficial in industries that deal with oils, chemicals, or debris. Sealing Options: Sealing the concrete can further protect it from water damage, stains, and surface wear, enhancing its longevity and maintaining its appearance. 3. Cost-Effective When compared to other industrial flooring materials, concrete is one of the most cost-effective options, especially when factoring in its durability and minimal maintenance needs. The initial installation may have a higher upfront cost compared to cheaper materials, but the long-term savings far outweigh this. Reduced Repair Costs: Concrete is less likely to crack or deteriorate under pressure, which means fewer repairs and replacements over time. Energy Efficiency: In large industrial spaces, concrete’s thermal properties can help maintain cooler temperatures, reducing the load on HVAC systems and lowering energy bills. 4. Slip Resistance for Safety Safety is paramount in any industrial setting, and concrete can be customized to include slip-resistant surfaces. This helps prevent accidents caused by slippery floors, especially in areas where water, oils, or other liquids are present. Textured Finishes: Adding textures or anti-slip coatings can increase traction and reduce the risk of slips and falls in the workplace. Compliance with Safety Regulations: Slip-resistant concrete flooring can help industrial spaces comply with safety regulations, protecting both employees and the business from potential liabilities. 5. Versatility in Design and Functionality While concrete is known for its strength and durability, it’s also incredibly versatile in terms of design. Concrete can be customized to suit the needs of the space, whether it’s through polishing, staining, or incorporating specific textures. Polished Concrete: Polished concrete offers a smooth, reflective surface that not only looks professional but also enhances light reflectivity, reducing the need for excessive lighting in large industrial spaces. Stained Concrete: Stains can be used to add color and design elements to concrete, improving the aesthetic of the flooring while maintaining its functional benefits. Resistant to Heat and Fire: In certain industrial settings where high temperatures or fire hazards are a concern, concrete offers a level of protection as it is fire-resistant and will not emit harmful fumes when exposed to heat. 6. Sustainability and Eco-Friendliness As businesses are becoming more conscious of their environmental impact, concrete stands out as a sustainable flooring option. It’s made from natural materials, including limestone, clay, and water, and can be sourced locally, reducing transportation-related emissions. Recyclable: Concrete can be recycled at the end of its lifespan, further contributing to its eco-friendly appeal. Energy Efficiency: Concrete’s thermal mass properties help regulate building temperatures by absorbing, storing, and slowly releasing heat, reducing energy consumption in industrial spaces. 7. Resistance to Chemicals and Abrasions In industries where exposure to chemicals, acids, or other corrosive substances is common, concrete floors offer superior resistance. This quality helps to maintain the integrity of the flooring, even in the harshest environments. Protective Coatings: Applying epoxy or polyurethane coatings can increase concrete’s resistance to chemical spills, abrasions, and impact, making it suitable for industrial facilities like laboratories, chemical plants, or food processing centers. 8. Quick Installation Time is money in the industrial world, and concrete flooring can be installed relatively quickly compared to some other flooring materials. Pre-fabricated concrete panels, in particular, allow for rapid installation, minimizing downtime for businesses. Minimal Disruption: With skilled contractors like Concrete Contractors London, the installation process can be completed efficiently, causing minimal disruption to your operations. Faster Curing Options: Advancements in concrete mixtures have resulted in faster curing times, allowing businesses to return to normal operations sooner. Conclusion Concrete offers a range of benefits that make it the ideal flooring solution for industrial spaces. Its durability, low maintenance, safety features, and cost-effectiveness provide businesses with a long-lasting solution that can withstand the daily demands of industrial work. Additionally, concrete’s versatility in design and eco-friendly attributes make it a smart choice for companies that want to invest in both functional and sustainable infrastructure. At Concrete Contractors London , we specialize in delivering high-quality industrial concrete flooring solutions that meet your specific needs. From installation to finish, we ensure that your concrete floors are durable, safe, and built to last. Contact us today to discuss how we can help transform your industrial space with the power of concrete.
October 13, 2024
Stamped concrete is a popular choice for homeowners in London, Ontario, looking to enhance their outdoor spaces with beautiful, durable surfaces that mimic the appearance of natural stone, brick, or wood. Whether it’s a patio, driveway, walkway, or pool deck, stamped concrete provides the aesthetic appeal of these high-end materials at a fraction of the cost. At Concrete Contractors London , we specialize in delivering high-quality stamped concrete installations that transform outdoor spaces into stunning focal points. In this article, we’ll take you through the process behind stamped concrete, from the initial installation to the finishing touches that bring out its rich, textured look. 1. Site Preparation The first step in any stamped concrete project is proper site preparation. This involves clearing the area of debris, vegetation, and any existing materials that could interfere with the concrete pour. Once the site is clean and level, we establish the forms (borders) for the concrete, which define the shape and layout of the stamped concrete surface. Proper grading and drainage are also key considerations at this stage. It’s important to ensure that water will run off appropriately without pooling on the surface, as excess moisture can compromise the longevity of the concrete. 2. Pouring the Concrete Once the site is prepped, the next step is to pour the concrete. We use a concrete mix specially formulated for stamped projects, ensuring that it’s durable and able to withstand the pressure of stamping and heavy traffic over time. The concrete is poured into the forms and spread evenly, creating a smooth surface. We pay close attention to ensuring the thickness of the concrete is consistent, as uneven surfaces can affect the final appearance of the stamped texture. 3. Adding Color to the Concrete One of the key elements that makes stamped concrete so visually appealing is the incorporation of color. This can be done in one of two ways: integral color or color hardeners. Integral color involves mixing the color directly into the concrete before it’s poured, ensuring an even distribution of color throughout the entire slab. This method offers long-lasting color that won’t fade over time. Color hardeners are applied to the surface of the freshly poured concrete. They not only add rich, vibrant color but also help to harden the surface of the concrete, making it more resistant to wear and tear. For many projects, a combination of integral color and color hardeners is used to create depth and dimension in the final product. 4. Stamping the Concrete After the concrete is poured and colored, we move on to the stamping phase. This is where the surface takes on the textured patterns that give stamped concrete its unique, high-end look. Stamping involves pressing textured mats or stamps into the concrete while it is still pliable. These mats are designed to replicate the appearance of materials like stone, slate, brick, or even wood. Timing is critical during the stamping process. The concrete needs to be firm enough to hold the impression of the stamps but soft enough for the texture to imprint without damaging the surface. Once the stamps are pressed in, they create a textured finish that looks remarkably similar to natural stone or brick. 5. Adding Release Agents Before stamping the concrete, we apply release agents to ensure the stamps don’t stick to the surface. These agents not only prevent the tools from bonding with the concrete but also add another layer of color, creating depth and highlighting the details of the stamped pattern. Release agents are typically available in contrasting colors to the base concrete, further enhancing the realistic look of the stamped surface. Once the stamping is complete, the release agent can be washed off, revealing the intricate textures and color variations of the stamped concrete. 6. Curing the Concrete Proper curing is essential to the long-term durability of stamped concrete. After the stamping process is complete, the concrete needs time to cure. During this period, we ensure that the surface remains moist and protected from extreme temperatures, which helps prevent cracking and ensures the concrete hardens evenly. The curing process can take several days, but it’s a crucial step to ensure the surface is strong and capable of withstanding weather, foot traffic, and vehicle loads over time. 7. Sealing the Concrete The final step in the stamped concrete process is applying a sealer. This protective layer serves several important functions: It enhances the color and appearance of the stamped concrete, giving it a vibrant, finished look. It protects the surface from moisture, stains, and the effects of weathering, prolonging the life of the concrete. It adds a slight sheen or gloss, depending on the sealer used, which can make the surface look even more like natural stone or brick. Sealing the concrete is crucial for maintaining its appearance and durability. Over time, you may need to reseal the surface to keep it looking its best. 8. Maintenance Tips for Stamped Concrete Although stamped concrete is durable, it does require regular maintenance to keep it looking its best. Here are some tips to extend the life of your stamped concrete: Clean the surface regularly: Sweep away debris and dirt to prevent surface abrasion, and wash the area with a gentle detergent as needed. Reseal the concrete every few years: Depending on the level of traffic and exposure to the elements, you should plan to reseal the surface every 2-3 years to protect it from wear and tear. Avoid harsh chemicals: De-icing salts and other harsh chemicals can damage the surface of the stamped concrete. Use caution when applying any products to the surface, especially during winter. Conclusion Stamped concrete is a versatile and cost-effective way to enhance your outdoor spaces with the look of natural stone, brick, or wood. By following a meticulous process that includes proper site preparation, stamping, coloring, and sealing, Concrete Contractors London delivers stunning, durable results that stand the test of time. Whether you’re looking to install a new patio, driveway, or walkway, stamped concrete can elevate the beauty and functionality of your outdoor space. If you're considering stamped concrete for your next project, reach out to us today to learn more about how we can bring your vision to life!
October 7, 2024
Concrete sidewalks are a durable, attractive, and long-lasting feature that adds both functionality and curb appeal to any property. However, the key to ensuring your sidewalk stands the test of time lies in the proper preparation of the ground before pouring the concrete. A poorly prepared base can lead to uneven settling, cracks, and other issues that can shorten the lifespan of your sidewalk. In this article, we’ll take a deep dive into the essential steps involved in preparing the ground for concrete sidewalk installation. Whether you’re planning a new project or upgrading an existing walkway, these foundational steps will ensure your sidewalk remains solid and functional for years to come. Step 1: Planning and Measuring the Sidewalk Area The first step in preparing the ground for a concrete sidewalk is planning and measuring. Start by identifying the location of the sidewalk and marking out its path using stakes and string lines. This outline helps you visualize the layout, determine the length and width of the sidewalk, and ensure that it fits the landscape's overall design. Key Considerations: Slope and Drainage: It’s essential to plan for proper drainage. Sidewalks should have a slight slope (about 1/4 inch per foot) away from structures to prevent water pooling and damage. Width: Residential sidewalks typically range from 3 to 5 feet in width, depending on the expected foot traffic. Path Shape: Straight paths are easier to install, but curved designs can add aesthetic appeal to your property. Once the layout is finalized, mark the edges of the sidewalk with stakes and string lines to serve as a guide for the next steps. Step 2: Excavation Excavation is a critical step in preparing the ground for a concrete sidewalk. It involves removing the top layer of soil, rocks, roots, and debris to create a stable base for the concrete. How to Excavate: Depth: Dig to a depth of about 6 to 8 inches. This allows space for both the compacted base material and the concrete slab, ensuring the sidewalk is properly supported. Remove Obstacles: Clear out any roots, large rocks, or debris that could interfere with the stability of the sidewalk. Use of Tools: Depending on the size of the project, you can use a shovel for smaller areas or heavy machinery like a mini-excavator for larger projects. The goal of excavation is to create a level and uniform area where the sidewalk will be installed. Step 3: Compaction of the Soil Once the area is excavated, the next step is compacting the soil. Properly compacted soil prevents the concrete from settling unevenly, which can cause cracks or shifting over time. Tools for Compaction: Hand Tamper: For small projects or areas, a hand tamper can be used to manually compact the soil. Plate Compactor: For larger areas, a mechanical plate compactor is recommended. It provides a more uniform and efficient compaction process. Ensure that the soil is compacted until it is firm and level. If the ground is too soft, it may need additional compaction or stabilization. Step 4: Installing a Gravel Base After compaction, a gravel base is installed to provide a stable foundation for the concrete. The gravel allows for better drainage and helps distribute the weight of the concrete evenly across the surface. Steps for Installing the Gravel Base: Type of Gravel: Crushed stone or gravel with a diameter of 3/4 inches is ideal for a solid base. Depth: Spread about 4 to 6 inches of gravel evenly across the excavated area. Compaction: After spreading the gravel, compact it using a plate compactor to create a firm base. This step prevents future settling and ensures that the sidewalk will remain level. Compacting the gravel base is as important as compacting the soil. It eliminates air pockets and provides a solid, well-draining surface for the concrete. Step 5: Installing Forms Forms are temporary barriers made of wood or metal that hold the concrete in place as it sets. They also help create clean, defined edges for the sidewalk. Installing the Forms: Materials: Use 2x4 wooden boards or flexible metal forms depending on whether your sidewalk is straight or curved. Anchoring: Secure the forms with stakes placed every 3 to 4 feet along the perimeter of the sidewalk. Make sure the forms are level and properly aligned with your string line guide. Elevation Check: Double-check the slope of the forms to ensure proper drainage. The top of the form should match the desired height of the finished concrete surface. The forms are critical in shaping the concrete and ensuring the sidewalk looks professional and consistent. Step 6: Adding Reinforcement For added strength, especially in areas prone to heavy foot traffic or soil movement, reinforcement may be necessary. Steel rebar or wire mesh can be embedded within the concrete to enhance its structural integrity. Types of Reinforcement: Rebar: Steel rods placed horizontally across the formwork help prevent cracks caused by movement or settling. Wire Mesh: A metal grid laid over the gravel base offers additional support for the concrete, distributing weight evenly. While not always required for small residential sidewalks, reinforcement adds durability to the concrete, reducing the risk of cracking over time. Step 7: Preparing for the Concrete Pour With the ground fully prepared, gravel compacted, and forms installed, you’re now ready for the final step: pouring the concrete. Ensure that all necessary tools and materials are on hand, and make any last-minute adjustments to the forms or reinforcement before the concrete arrives. Why Proper Ground Preparation is Crucial Proper ground preparation is the foundation of a successful concrete sidewalk installation. Without these critical steps, the sidewalk could suffer from uneven settling, cracks, and a shorter lifespan. By thoroughly preparing the ground, you ensure that your concrete sidewalk remains level, durable, and resistant to weather and wear over time. At Concrete Contractors London, we specialize in professional concrete sidewalk installations that are built to last. Our team has the experience and expertise to prepare the ground and pour high-quality concrete sidewalks that enhance the value and appearance of your property. Conclusion Preparing the ground for concrete sidewalk installation is a vital step that determines the long-term success of your project. Proper excavation, compaction, and the installation of a solid gravel base are essential for creating a smooth, durable, and long-lasting sidewalk. By following these steps, you’ll ensure that your concrete sidewalk withstands the test of time, offering both functionality and aesthetic appeal. For expert concrete sidewalk installation in London, Ontario, Concrete Contractors London is here to help. Contact us today to learn more about our services and how we can bring your concrete project to life!
September 29, 2024
When most people think of concrete, they picture sidewalks, driveways, or industrial projects, but concrete is so much more than a basic building material. In modern home renovations, concrete has proven itself as a versatile, durable, and stylish option for various applications. Whether you’re redesigning your home’s exterior or updating your interior spaces, concrete can be an excellent choice. In this article, we’ll explore how homeowners in London, Ontario, can use concrete in creative and functional ways for their next renovation. 1. Concrete Flooring: Style and Durability Combined Concrete floors have gained significant popularity in home renovations due to their sleek, contemporary appearance and durability. Unlike traditional flooring options like hardwood or tile, polished concrete floors can offer a clean, modern aesthetic with the added benefit of being highly durable and easy to maintain. Benefits of Concrete Flooring: Customizable: Concrete floors can be stained, polished, or stamped to achieve a variety of looks, from high-gloss finishes to textured surfaces that mimic stone or wood. Durability: Concrete is resistant to scratches, dents, and wear, making it an excellent choice for high-traffic areas such as kitchens, living rooms, and hallways. Low Maintenance: Concrete floors are easy to clean and require minimal upkeep, making them a practical choice for busy households. For homeowners in London looking to achieve a unique look in their home renovation, concrete flooring can provide both style and strength. 2. Concrete Countertops: A Sleek, Modern Touch For kitchen or bathroom renovations, concrete countertops are becoming a popular alternative to traditional materials like granite or quartz. Concrete countertops offer a custom, handcrafted look that can be tailored to fit your design vision. Advantages of Concrete Countertops: Custom Shapes and Sizes: Since concrete is poured into molds, it can be customized to fit any size or shape, making it perfect for unique or unconventional spaces. Variety of Finishes: Concrete countertops can be tinted, stained, or polished to match your desired style. You can even embed decorative elements like stones, glass, or shells to create a truly one-of-a-kind look. Heat and Scratch Resistance: Concrete is naturally resistant to heat and scratches, making it a practical option for busy kitchens. While concrete countertops do require periodic sealing to protect against stains, their durability and design flexibility make them a worthwhile investment for homeowners seeking a custom, modern aesthetic. 3. Outdoor Living Spaces: Concrete Patios and Walkways When it comes to outdoor renovations, concrete is one of the best materials for creating functional and attractive patios , walkways , and driveways . Its versatility in design and durability make it a top choice for homeowners looking to enhance their outdoor living spaces. Concrete Patios and Walkways Benefits: Design Flexibility: Concrete can be stamped, stained, or textured to create various patterns and finishes. From natural stone looks to intricate designs, concrete can mimic more expensive materials at a fraction of the cost. Durability: Concrete patios and walkways are built to withstand harsh weather conditions, including freezing winters and hot summers in Ontario, without cracking or fading. Low Maintenance: Unlike wooden decks that require regular staining or repairs, concrete patios need minimal maintenance. Occasional cleaning and resealing are all it takes to keep them looking great. For London homeowners, a concrete patio or walkway can transform a backyard into a comfortable, stylish space for relaxation and entertainment. 4. Concrete Fireplaces: The Ultimate Statement Piece One of the most unique applications of concrete in home renovations is as a fireplace surround. Concrete fireplaces can serve as a dramatic focal point in any living room, adding a touch of modern elegance and warmth. Why Choose a Concrete Fireplace: Custom Design: A concrete fireplace can be poured and shaped to suit your exact design preferences, whether you want a sleek, minimalist look or a more textured, rustic appearance. Heat Resistance: Concrete is naturally heat-resistant, making it an ideal material for fireplace surrounds. Unique Aesthetic: Concrete fireplaces can be polished for a smooth, contemporary finish or left rough for a more industrial look, giving you endless design possibilities. For those looking to make a bold statement in their home renovation, a concrete fireplace can add both style and functionality to any living space. 5. Concrete Retaining Walls and Planters: Enhancing Your Landscape Concrete is not limited to interior applications; it’s also a fantastic material for enhancing your home’s landscaping. Retaining walls, garden beds, and decorative planters made of concrete can bring structure, texture, and durability to your outdoor spaces. Benefits of Using Concrete in Landscaping: Strength and Stability: Concrete retaining walls provide crucial support for uneven or sloped landscapes, preventing soil erosion and creating a clean, organized look. Customization: Concrete planters and garden beds can be cast in a variety of shapes and sizes, giving you the flexibility to design a unique outdoor space. Weather Resistance: Concrete is impervious to the elements, making it an excellent choice for outdoor structures that need to withstand rain, snow, and temperature fluctuations. Whether you’re looking to create raised garden beds or reinforce a sloped backyard, concrete offers both form and function for your landscaping needs. Conclusion Concrete’s versatility in home renovations goes far beyond its traditional uses. From sleek indoor flooring and countertops to durable outdoor patios and retaining walls, concrete is a highly customizable material that can enhance both the functionality and aesthetics of your home. If you’re considering a renovation in London, Ontario, the expert team at Concrete Contractors London can help you explore the many possibilities of using concrete to transform your space. Whether you’re upgrading your kitchen, living room, or outdoor area, concrete’s durability, low maintenance, and endless design options make it a standout choice for homeowners looking to invest in long-lasting and beautiful home renovations.
September 22, 2024
Concrete is one of the most durable and long-lasting materials used in construction. However, even the toughest concrete surfaces can develop small cracks over time. While these cracks might seem insignificant at first, they can lead to much bigger problems if left unattended. At Concrete Contractors London, we understand the importance of timely concrete repair and want to emphasize why you shouldn’t ignore small cracks in your concrete. Understanding the Causes of Concrete Cracks Before diving into why small cracks should be addressed, it’s important to understand what causes them in the first place. Common factors include: Shrinkage: As concrete dries and cures, it can shrink slightly, leading to hairline cracks. Temperature Fluctuations: Changes in temperature can cause concrete to expand and contract, leading to cracks over time. Settlement: The ground beneath your concrete may shift or settle, causing the surface to crack. Overloading: Excessive weight or pressure on concrete surfaces can cause them to crack. Poor Installation: Improperly mixed or laid concrete is more prone to cracking. The Risks of Ignoring Small Cracks Small cracks might seem harmless, but they can lead to serious issues if left unaddressed. Here’s why you shouldn’t ignore them: 1. Water Infiltration Cracks in concrete provide an entry point for water. Once water seeps into the cracks, it can cause further damage, especially during freeze-thaw cycles. In colder climates, like in London, Ontario, water that enters the cracks can freeze and expand, causing the cracks to widen and leading to more significant structural damage over time. 2. Weakened Structural Integrity Even small cracks can weaken the overall structural integrity of your concrete surfaces. Over time, these cracks can grow larger and compromise the stability of the concrete. This is particularly concerning for load-bearing surfaces, such as driveways, foundations, and patios. Ignoring small cracks can lead to more extensive and costly repairs down the line. 3. Increased Repair Costs Addressing small cracks as soon as they appear is far more cost-effective than waiting until the damage becomes severe. Small cracks are relatively easy and inexpensive to repair. However, if left unattended, they can develop into larger cracks or even result in the need for complete concrete replacement, which is a much more expensive and time-consuming process. 4. Safety Hazards Cracks in concrete surfaces can pose safety hazards, particularly if they are located in high-traffic areas like walkways, driveways, or patios. Over time, these cracks can create uneven surfaces that increase the risk of trips and falls, potentially leading to injuries. Repairing small cracks promptly can help prevent accidents and keep your property safe. 5. Aesthetic Appeal Cracked concrete surfaces can detract from the overall appearance of your property. Whether it’s your driveway, patio, or walkway, small cracks can make your concrete look worn and neglected. Repairing these cracks can help maintain the aesthetic appeal of your property and improve its curb appeal. How to Address Small Concrete Cracks The good news is that small cracks in your concrete can be repaired quickly and effectively if caught early. Here’s how: Clean the Crack: Remove any debris, dirt, or loose material from the crack using a wire brush or pressure washer. This will ensure the repair material adheres properly. Apply a Concrete Repair Product: Use a concrete crack filler or sealant designed for small cracks. Apply it according to the manufacturer’s instructions, making sure to fill the crack completely. Smooth the Surface: Use a trowel or putty knife to smooth the surface of the repair material, ensuring it blends seamlessly with the surrounding concrete. Allow Time to Cure: Follow the recommended curing time for the repair product before using the surface again. Consider Professional Help: If you’re unsure about the repair process or the crack is larger than expected, it’s best to consult with a professional concrete contractor. Conclusion Small cracks in your concrete might not seem like a big deal, but they can lead to serious problems if left untreated. From water infiltration and weakened structural integrity to safety hazards and increased repair costs, the risks of ignoring small cracks are significant. At Concrete Contractors London , we’re here to help you keep your concrete surfaces in top condition. Don’t wait until small cracks become big issues—contact us today for expert concrete repair services and ensure your property remains safe, attractive, and durable for years to come.
More Posts
Share by: